
RTÉVerified account @rte 18 minutes ago
Neven Maguire’s Mediterranean monkfish and potato stew with an almond crumb, Nom, Nom. Check out the recipe here: https://www.rte.ie/lifestyle/recipes/2017/0301/856327-nevens/ …, via @rtefood.

Nutrition key to sound health
RTÉVerified account @rte 18 minutes ago
Neven Maguire’s Mediterranean monkfish and potato stew with an almond crumb, Nom, Nom. Check out the recipe here: https://www.rte.ie/lifestyle/recipes/2017/0301/856327-nevens/ …, via @rtefood.
https://www.instagram.com/reel/C7AAVU2MowW/?igsh=MWZsNXNwcW1vdHhrdA==

 dunnesstores
Celebrity Chef
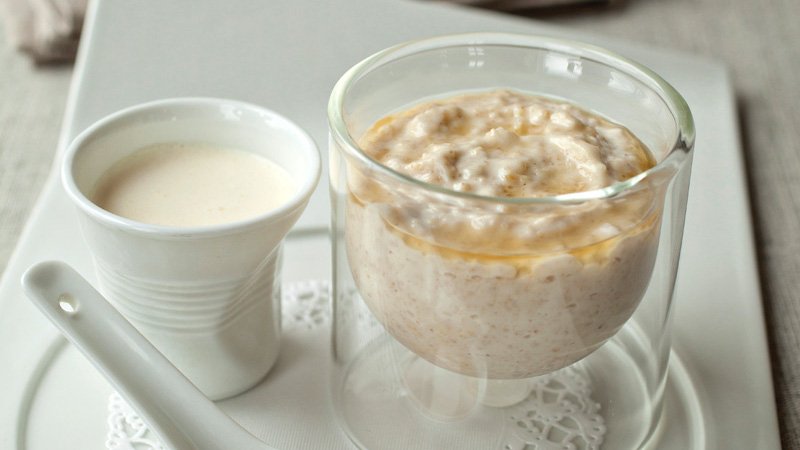
Porridge is one of our most popular breakfasts in the restaurant, and this recipe goes down a treat. On cold winter mornings, it gets you off to a good start and takes no more than 10 minutes to prepare.
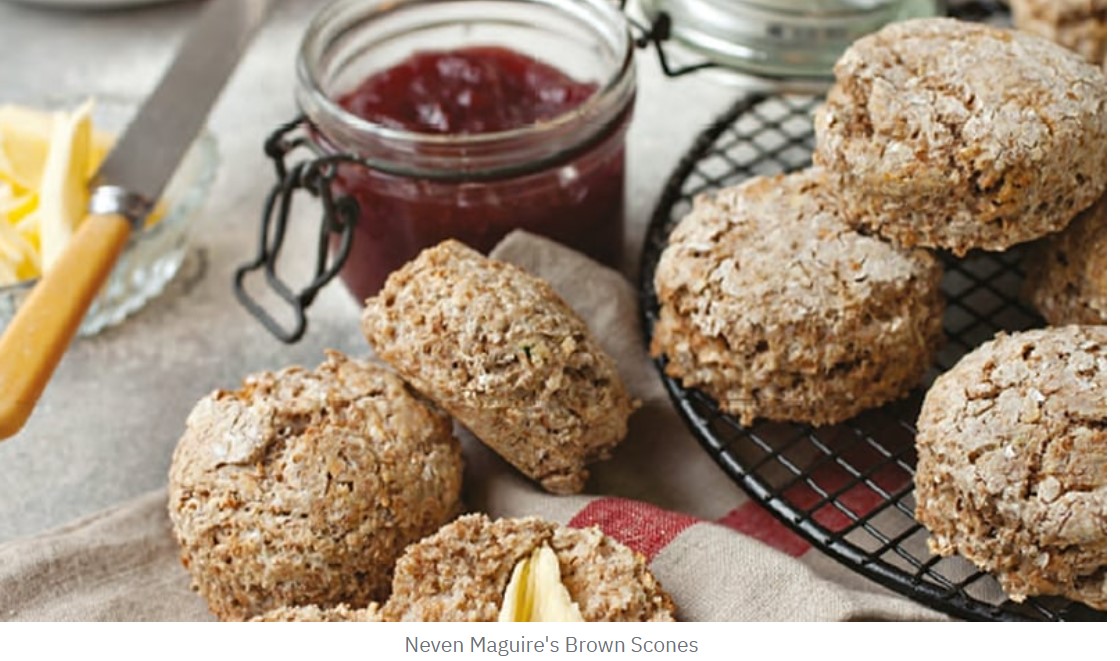
Brown scones are full of roughage and great for breakfast. And here is a good tip: you can make this mixture, shape the scones and freeze them. You can then cook the scones straight from the freezer to the oven – just give them an extra 5 minutes and make sure the scones are golden brown and well-risen.
Celebrity Chef
More from
Neven Maguire: Home Chef
https://www.instagram.com/reel/C6J7tvkLtD4/?igsh=MWR2cHJyeGlzbW5kMg==
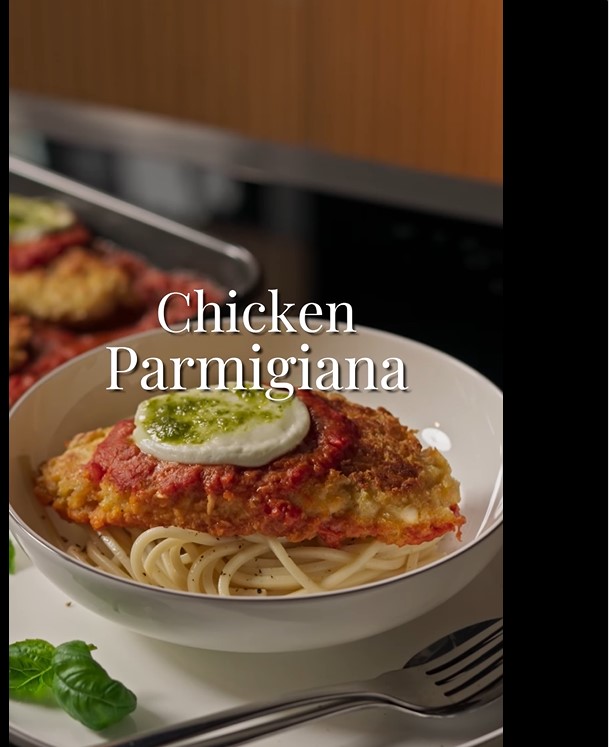
#ad | Looking for the perfect chicken dinner? Try this Chicken Parmigiana recipe from our @simplybetterds brand ambassador @nevenmaguire find the full recipe below and shop the ingredients in your local @dunnesstores
Ingredients (Serves 4)
2 Simply Better Irish Corn Fed Chicken Fillets
2 Simply Better Irish Free Range Corn Fed Large eggs
2 Tbsp. Simply Better Organic Irish Jersey Milk
150g Simply Better Rustic Ciabatta Breadcrumbs
50g Simply Better Parmigiano Reggiano grated, plus extra to garnish
2 Tbsp. Simply Better Italian Extra Virgin Olive Oil
1 Tub Simply Better Italian Mozzarella, cut into 4 slices
1 Jar Simply Better Italian Tomato & Mascarpone Pasta Sauce
25g Butter
75g Plain Flour
A small handful of fresh basil leaves
To serve:
300g Simply Better Italian Bronze Die Spaghetti, cooked
Mixed Leaf Salad
DIRECTIONS
1. Place the chicken on a chopping board and cut each fillet in half lengthways. Spread them out and cover with parchment paper, then bash with a rolling pin until they are about 1cm thick.
2. Put the flour in a dish and season generously with salt and pepper. Put the eggs in a separate dish with the milk and season, then beat lightly with a fork. Put the breadcrumbs and Parmesan into a third dish, stirring to combine. Dust each chicken escalope in the seasoned flour, then dip into the beaten eggs and finally coat it in the breadcrumbs. Arrange on a plate.
3. Preheat the oven to 180°C (350°F/gas mark 4).
4. Heat the oil and butter in a large non-stick frying pan over a medium heat. Cook the escalope’s for 2 minutes on each side, until crisp and golden. Pour half of the tomato sauce on a baking tray or into a baking dish, then add the chicken. Spoon a little of the sauce on each one and top with a piece of mozzarella and a spoon of pesto. Transfer to the oven and cook for 10-12 minutes, until the mozzarella is bubbling.
5. Garnish the chicken with some fresh basil and serve straight to the table with a bowl of spaghetti and a bowl of salad so everyone can help themselves.

Tiramisu
The name of this simple dessert comes from the Italian tirami su, meaning ‘pick me up’ (or ‘cheer me up’). Tiramisu has been subjected to many variations over the years, but this is the original recipe and – in my opinion – the best! This is a dessert that actually benefits from being made ahead, allowing the lovely flavours to mingle. As a result, it is perfect for a large gathering.
Serves 8–10
Separate the eggs, putting the yolks in one bowl with 80g of the sugar, and the egg whites in another. Using an electric beater, whisk the egg yolks and sugar until pale and creamy, then mix in the mascarpone cheese until well combined. Whip the cream in a separate bowl until soft peaks form, then fold into the egg yolk and mascarpone mixture.
Using spotlessly clean beaters, whisk the egg whites with 20g of sugar until soft peaks form, then fold this into the mascarpone cream. Spoon a third of this mixture into a suitable dish that is at least 2cm deep. Pour the coffee into a shallow dish and stir in the Tia Maria or Kahlúa. Dip in enough of the sponge fingers to make an even layer on top of the mascarpone mixture. Only dip the sponge fingers in as you go along, so they don’t soak for too long and become difficult to handle.
Cover the layer of soaked sponge fingers with another third of the mascarpone mixture, then grate most of the chocolate bar on top using the coarse side of a grater. Add another layer with the rest of the soaked sponge fingers, then spoon over the remaining mascarpone mixture and spread evenly with a back of a spoon. Cover with cling film and chill overnight to allow the flavours to develop and the dessert to settle. To serve, give the tiramisu a good dusting of cocoa powder, then grate over the rest of the chocolate. Place in the middle of the table so that everyone can help themselves.
SERVE AFTER … A go-to dessert if you like spoiling your guests after a long Italian-inspired meal. Tiramisu is ideal for the warmer months since it can be made well in advance and kept in the fridge until needed.
Pavlova Wreath with Exotic Fruit
Cakes are always the sweet option of choice for birthdays and anniversaries. However, I would like to introduce to you the Pavlova Wreath – it is very pretty and easy to make, and it delivers an incredible flavour. As always, feel free to use your own favourite combination of flavours to personalise it. Be sure to produce it with a flourish for that ‘ta-da’ moment!
Serves 10–12
Preheat the oven to 140°C (275°F/Gas Mark 1). Put the egg whites into the bowl of a stand mixer.
Turn on to a medium speed and whisk until they begin to go frothy and hold their shape a little. Mix the caster and icing sugar together, then add about one third to the eggs in a steady stream, whisking all the time on medium to high. The mixture will now begin to thicken a little.
Make sure that all the sugar has dissolved before you add any more. Add the next third and repeat the process, whisking it all up well. Then add the final third of the sugar. Whisk on high now, since the egg mixture will be much more stable. Keep whisking until you reach the stiff-peak stage. Add the cornflour and fold in with a spoon. Draw a 25cm circle on a piece of parchment paper and use it to line a large baking sheet, then draw a 10cm circle in the middle. This is your stencil. Put dollops of the meringue mixture on to the wreath stencil, keeping it within the edges.
Bake for 55–60 minutes until the meringue has just a little colour. Remove it from the oven and leave to cool. Meanwhile, make the raspberry sauce. Blitz the raspberries in a food processor with the icing sugar and lime juice, then pass through a sieve into a small pan using a plastic spatula. Mix the cornflour or arrowroot with one tablespoon of water until smooth, then add this to the raspberries. Bring to the boil over medium to high heat, then simmer gently for a few minutes until thickened, stirring occasionally.
Set aside to cool. For the crème Chantilly, whisk up the cream, vanilla and sugar in a bowl until it is just beginning to hold soft peaks. Cover with cling film and chill until needed. Carefully slide your Pavlova wreath on to a large, flat serving plate. Place dollops of the crème Chantilly around the top of the wreath, then drizzle over some of the raspberry sauce; the rest can be served in a jug at the table. Decorate the wreath with the raspberries, lychees and passion fruit pulp. Serve straight away.

Use a little water to dampen a 450g (1lb) loaf tin (the more square shaped, the better), then line with a double layer of cling film. Line 2 large baking sheets with non-stick baking paper.
Melt the plain chocolate in a heatproof bowl set over a pan of simmering water. Spoon half the melted chocolate onto each sheet of baking paper and spread it out to the edges in a thin layer. Put in the fridge for about 30 minutes to set.
Melt the white chocolate and 5 tablespoons of the cream in a separate heatproof bowl set over a pan of simmering water. Once melted, give it a good stir and set aside to cool.
Whip the rest of the cream in a large bowl with the vanilla seeds until the cream is just holding its shape, then fold in the cooled melted white chocolate.
In a separate bowl, whisk the egg white and icing sugar until stiff peaks have formed, then fold into the white chocolate mixture.
Carefully peel the plain chocolate from the baking paper and break it up into pieces.
Place a couple spoonfuls of the whipped cream mixture into the prepared loaf tin and cover with a layer of the plain chocolate pieces. Repeat the layers until the loaf tin is filled up, finishing with a layer of whipped cream. Cover the top with cling film and freeze overnight (or up to 1 month). Any remaining pieces of plain chocolate can be put into a freezer-proof container and frozen separately to use for decoration.
About 1 hour before serving, transfer the loaf tin and reserved chocolate decoration to the fridge.
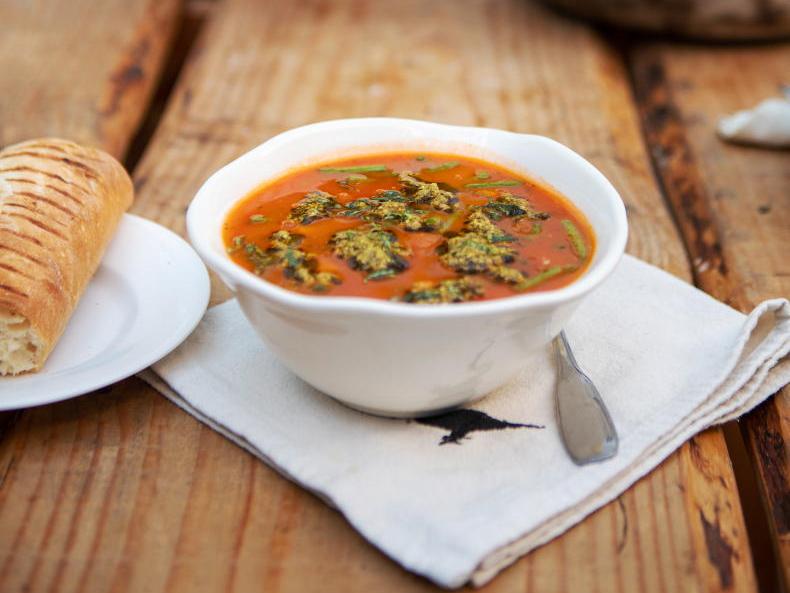

I never tire of a bowl of steaming hot stew. It’s the attention to detail that makes this dish one of the world’s great classics. This is my version that I have developed over the years. It’s a meal in itself, but for a special celebration, try serving it buffet style with bowls of turnip mash, colcannon and maybe even some glazed parsnips and carrots and watch your guests’ faces light up!
SERVES 6–8
1 Place the boneless lamb pieces in a large heavy-based pan or flameproof casserole and pour over the stock. Bring to the boil, then skim off any scum from the surface and then stir in
the barley. Reduce the heat and simmer gently for 50 minutes, until slightly reduced and the lamb is almost tender.
2 Add the potatoes to the lamb with the carrots, leeks, pearl onions, smoked bacon and thyme and simmer for 30 minutes, until the lamb and vegetables are completely tender but still holding their shape. Season to taste with salt and pepper.
3 Put the stew straight onto the table and scatter over the parsley. Serve dishes of the turnip mash with crispy bacon and onion and colcannon alongside and allow everyone to help themselves.
Oatmeal, Cranberry and White Chocolate Cookies
This recipe was given to me by Mary Flahavan. I like it so much that we now make it up in batches and keep them in Kilner jars in our rooms for guests in case they’re feeling a bit peckish after a long journey but don’t want to ruin their dinner.
Preheat the oven to 200°C (400°F/gas mark 6). Line 2 baking sheets with parchment paper. Blend the oatlets in a food processor until quite fine. Add the butter, sugar, flour and baking soda and blend again until the dough just comes together.
Tip into a bowl and beat in the cranberries and white chocolate. Shape into 12 even-sized balls and arrange on the lined baking sheets well spaced apart, then squash them down with the palm of your hand to about a 4cm (1 ½in) thickness. Bake for 15–20 minutes, until they are a pale golden colour and soft to the touch. Remove from the oven and leave to cool and harden on the sheets for a minute, then transfer to a wire rack and leave to cool for a few minutes before tucking in with a nice cup of tea.
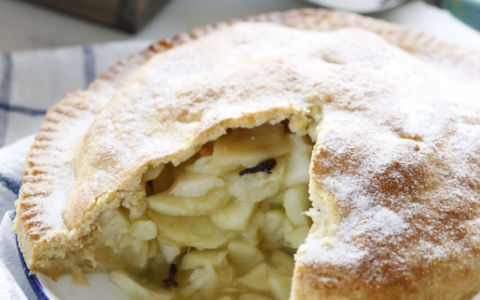
Pastry
Filling
Custard
To make the pastry: Sift the flour and icing sugar into a bowl. Using a round-bladed knife or the tips of your fingers, work in the butter and then mix in the egg yolks. Add the ice-cold water until the dough just comes together. Wrap in cling film and chill for at least 30 minutes.
Preheat the oven to 190°C (375°F/gas mark 5). Lightly dust the work surface with flour.
Divide the pastry into 2 portions, one slightly larger than the other, then roll out the larger piece until it is about 30cm in diameter. Use to line a 20cm pie dish or a 23cm flat plate, gently pressing into the corners. Trim the edges with a knife and reserve the excess for decorating. Place back in the fridge to chill while you prepare the apples.
Peel, core and slice the apples. Place in a large bowl with all but 1 tablespoon of the caster sugar. Add the cinnamon and cloves and mix together. Brush the edge of the pastry with a little milk and then pile the apples into the lined pie dish. Roll out the second piece of pastry into a circle slightly larger than the pie dish and use to cover the apples. Press the edges together to seal, then use a sharp knife to cut away any excess.
Crimp the edges of the tart with a round-bladed knife, using your fingers as a guide. If you wish roll out the pastry scraps and cut into leaf shapes. Brush the shapes with milk and stick on top of the pie. Brush the entire top of the pastry with milk and sprinkle over the remaining 1 tablespoon of sugar. Bake for 25-30 minutes, then reduce the oven to 180°C (350°F/gas mark 4) and bake for another 20-25 minutes, until golden brown.
Meanwhile, to make the custard, place the egg yolks in a large bowl with the sugar and vanilla seeds. Whisk with an electric mixer for a few minutes, until pale and thickened.
Place the milk and cream in a medium pan and bring to the boil, then immediately remove from the heat. Gradually whisk the heated milk and cream into the egg yolk mixture until smooth, then pour back into the pan and place over a gently heat. Cook gently for 6-8 minutes on a medium heat, stirring constantly, until the custard coats the back of a wooden spoon. Keep warm.
To serve, cut the warm apple tart into slices and arrange on warmed serving places with some of the custard. Pour the remaining custard into a jug and hand around separately.
http://www.bordbia.ie/consumer/recipes/desserts/pages/appletartwithcustard.aspx
