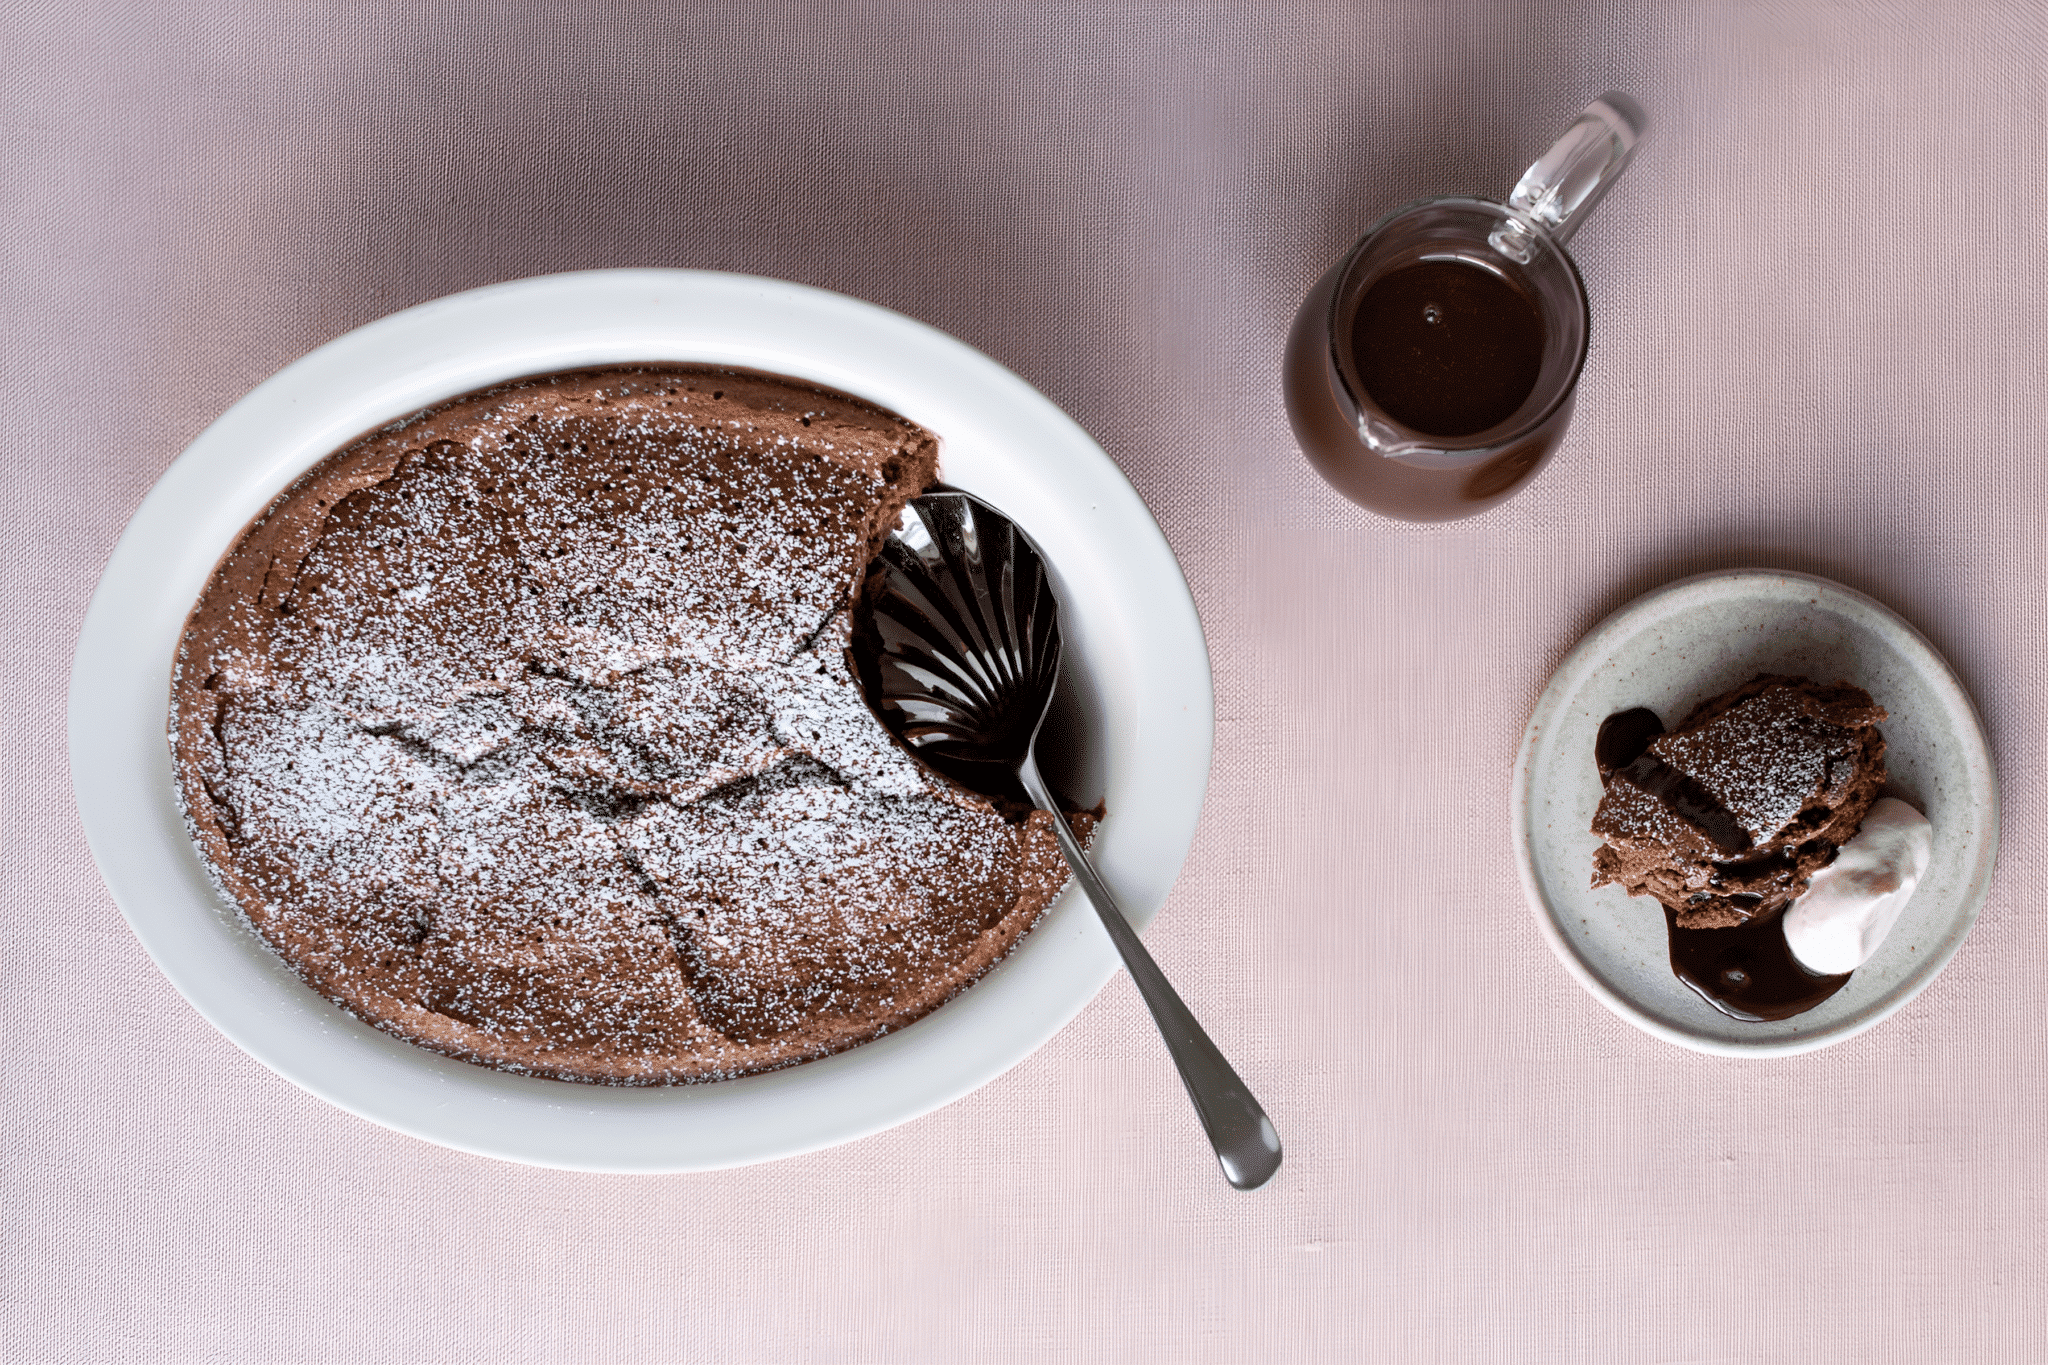
Sweet And Moist Greek Honey Cake #HaughtonHoney

greek-honey-cake-1-w450h450

A sticky Greek cake that tastes a little like the much more complicated Greek dessert Baklava

Thanks to Angela for this simple cake recipe that kids just love.

Ingredients

  • 1 cup of plain flour
  • 1 1/2 teaspoons of baking powder
  • 1/4 teaspoon of salt
  • 1/2 teaspoon of ground cinnamon
  • 1 teaspoon of orange zest
  • 3/4 cup of butter
  • 3/4 cup of white sugar
  • 3 eggs
  • 3/4 cup of milk
  • 1 cup of chopped walnuts
  • 1 cup of Haughton Honey
  • 1 cup of white sugar
  • 3/4 cup of water
  • 1 teaspoon of lemon juice

Instructions

  1. Preheat your oven to 175c/350F. Grease and lightly flour a 9″ square cake tin. Combine the flour, baking powder, salt, cinnamon and orange rind. Set this to one side.
  2. In a large bowl mix together the butter and the sugar with a whisk until light and fluffy. Then blend in the eggs one at a time. Gently blend in the flour mixture prepared earlier with the milk and stir in the walnuts.
  3. Pour the batter in to the prepared tin. Place in the preheated oven for 40 minutes, or until a skewer inserted into the centre of the cake comes out clean. Allow the cake to cool for 15 minutes and then cut the cake into diamond shapes before pouring the honey syrup over. Decorate with lemon zest if you wish.
  4. To make the honey syrup combine the honey, 1 cup of white sugar and 3/4 cup of water. Bring slowly to a gentle simmer for 5 minutes. Stir in the lemon juice and continue cooking for a further 2 minutes. Keep warm before pouring on to the cake.

Notes for the cook: if you have a fan-assisted oven then reduce the specified temperature in the recipe by about 15% ~ 1 teaspoon = 5ml and 1 tablespoon = 15ml ~ some ingredients are measured in cups and some equivalents are; 150g, 6oz (1/2 cup) = 120ml, 4fl oz

http://www.haughtonhoney.com/our-honey/recipes/sweet-and-moist-greek-honey-cake

Bangers and Cheesy Mash with Caramelised Red Onion Gravy @dunnesstores @nevenmaguire

https://www.instagram.com/reel/CxIuNvMpecv/?igshid=MTc4MmM1YmI2Ng==

dunnesstores

Follow

Original audio

Liked by ingridabernotaite and others

  • dunnesstores's profile picturedunnesstores
  • This recipe for Bangers & Cheesy Mash from our Simply Better brand ambassador @nevenmaguire is the perfect comfort food. Find the full recipe below:

    Bangers & Cheesy Mash with Caramelised Red Onion Gravy
    Ingredients (Serves 4)
    2 Packs Simply Better Irish Pork Spring Onion & Black Pepper Sausages
    2 Tubs Simply Better Irish Made Beef Gravy
    3 Tbsp. Simply Better Handmade Caramelised Red Onion Relish
    1 Tbsp. Simply Better Italian Extra Virgin Olive Oil
    1 Tbsp. Simply Better Italian Balsamic Vinegar
    Steamed Greens, to serve
    Cheesy Mash
    100g Simply Better West Cork Co-Op Extra Mature Drinagh Cheddar, grated
    750g Rooster Potatoes, cut into chunks
    75g Butter
    Method
    1. Preheat the oven to 200°C (400°F/Gas Mark 6). Place the sausages on a baking tray lined with parchment paper, drizzle with the olive oil and cook in the oven for 25 minutes, turning halfway through cooking to ensure they are golden brown on all sides.
    2. To make the mash, put the potatoes in a pot of cold salted water. Cover and bring to the boil, then reduce the heat and simmer for 15-20 minutes, until tender. Drain the potatoes and return to the pot over a low heat for 1-2 minutes to remove as much moisture as possible. Remove the pot from the heat, then mash with a potato masher or pass through a potato ricer until smooth. Beat in the cheese and butter and season to taste.
    3. To make the gravy, heat the gravy in a saucepan over a medium heat, whisk in the caramelised red onion relish and balsamic vinegar and simmer for 2-3 minutes.
    4. To serve, place a large spoonful of mash in the centre of a plate or serving bowl. Top with 3 of the roasted sausages and pour over the onion gravy. Serve with some of the steamed greens.

Japanese milk bread – Shokupan @rachelallencooks #Ballymaloe

rachelallencooks

Verified

ballymaloecookeryschool and others

  • rachelallencooks's profile picturerachelallencooks
  • Happy Homemade Bread Day 🍞

    Japanese milk bread – Shokupan

    This is a Japanese tear-and-share loaf of bread with the most wonderful pillowy soft texture. It’s inspired by the Yudane and Tangzhong method where a little bit of flour and water or milk (both in this case) are cooked together to make a white sauce before mixing in the remaining ingredients. This method pre-gelatinises the starch in the flour allowing it to absorb more liquid, giving you a super-light loaf that stays fresh for longer as it retains the moisture.

    It also is divine with cinnamon, cardamom,dried fruit and/or candied peel added as a sweet treat.

    Here’s the recipe 👇🏽 below in Comments in 2 parts! Happy baking 🧡

    This bread can be made so easily using a Thermomix @thermomixukanireland
  • This quantity will make one 23 cm tear-and-share loaf.

    50g water
    50g milk
    15g strong white flour

    375g strong white flour
    15g milk powder
    25g caster sugar
    1 teaspoon salt
    115g milk
    1 egg, beaten
    25g fresh yeast or 12g dried yeast
    50g butter, melted

    Pour the water and the milk into a small saucepan and bring to the boil. Add in the 15g of flour & cook, whisking all the time, over the heat for a couple of minutes until the liquid has thickened to a white sauce. Tip the white sauce into a bowl & cool.
    Place the 375g of strong white flour in a mixing bowl, or the bowl of an electric food mixer (with the dough hook attached) ) with the milk powder, the sugar & the salt, & mix.
    Now place the milk in a separate bowl & add in the beaten egg, the yeast,the melted butter & the white sauce. Stir then pour all of this liquid into the dry ingredients & mix to a dough. Knead for 8-10 minutes by hand or in the machine until you have a smooth and almost springy dough, don’t add flour while you’re kneading, the dough is supposed to be slightly sticky. When I’m using a stand mixer for this I scrape down the sides of the bowl a couple of times during kneading.
    When the dough has been kneaded enough it will be smooth on the outside. Press it with a floured finger and the dent that you make with your finger should spring back a little bit.
    Place the dough into a bowl that’s large enough to take the dough when doubled in size (or leave it in the stand mixer bowl) & cover the bowl with a clean tea towel or a plate. Place it somewhere warm, not above 45’C, or just standing on the counter in your kitchen and allow the dough to double in size, this may take 2 hours. If you wish you can place the covered bowl of dough in the fridge overnight.
    When the dough has doubled in size, using a floured fist, punch the dough down to knock it back then knead it for just 1 minute.
    Brush a 23cm spring-form tin with melted butter, then dust with flour.
    Divide the dough into 8 equal pieces, each weighing about 90g. Keep all dough covered with a clean tea towel while you work with one ball of dough. On a very lightly floured work surface, place one ball of dough.2 likesReply
  • rachelallencooks's profile picturerachelallencooksVerifiedOn a very lightly floured work surface, place one ball of dough. Fold the edges, all the way round, into the centre of the ball of dough, squashing it down in the centre as you go. Turn the ball over so that the folded side is on the underside and the smooth side is on top. Roll the ball gently under the palm of your hand to make a round roll then place into the prepared tin. Repeat with all the other balls of dough so that you end up with 7 around the sides, spaced apart, and one ball in the centre. Now cover with the tea towel again and place on the worktop or somewhere a little warmer, again not above 45’C , and allow to rise again until almost doubled in size, about 35-45 minutes.
    Preheat an oven to 200’C. The dough is ready when you make a little dent with a floured finger and it doesn’t spring back. Also, the balls of dough should have joined together at this stage. Whisk the egg with a pinch of salt and brush very gently over the top of the risen bread. Place the bread in the lower part of the preheated oven to bake for 30-40 minutes. The dough, out of the tin, should sound hollow when you tap it on the base. If you wish you can bake the bread out of the tin for the last 5 minutes of cooking time. Place on a wire rack to cool.2 likesReply
  • leanwithlesleyLooks delicious, reminds me of your ciabatta/tabata 😂❤️Reply
  • View replies (1)

At the Japanese Garden you can breathe in an array of exotic fragrances from sweet magnolia flowers, perfumed azaleas and cherry and apple blossom trees @powerscourt_estate

powerscourt_estate

Follow

Powerscourt Estate

Liked by pamelasc_nutricionista and others

  • powerscourt_estate's profile picturepowerscourt_estate
  • Easter and Spring are the the perfect time to discover Powerscourt when the Estate and gardens are starting to bloom. Don’t miss the opportunity to see 30,000 tulips and Spring bulbs in bloom at this year’s Annual Tulip Festival. At the Japanese Garden you can breathe in an array of exotic fragrances from sweet magnolia flowers, perfumed azaleas and cherry and apple blossom trees, bearing cascades of pink and white flowers. The Camellias in the Memorial Garden and the thousands of daffodils throughout the gardens and Estate bring Spring cheer after the long winter months.

    We hope to see you up on the Estate this Easter enjoying the Spring blooms in the gardens.