I’m a big country music fan and I love cooking!! So, when I saw Trisha Yearwood had a new cookbook, I had to give it a try!
You can tell that Trisha has put a lot of heart and soul into this cookbook. She shares family recipes and stories throughout. Trisha has a way of making you feel like you are a guest at her dinner table. By the end, you feel like you know, not only her better, but others in her family.
The recipes did not disappoint. As always, when I do a cookbook review, I had to try some of the recipes so I could genuinely rate the cookbook. There is a little something for everyone with 125 recipes that cover everything from breakfast, snacks, pork & beef, chicken, turkey & fish, etc. I made Company Chicken and PB&J Cookie Bars. What I love about the book is that it doesn’t call for a bunch of fancy ingredients, and I had everything on hand to make these two recipes. The Company Chicken was very flavorful and something easy that I will be able to make for guests. The PB&J Cookie Bars have become a fast breakfast in my household and are also super easy to make.
Keep in mind that most of the recipes are southern-inspired comfort food so, if you want to make the recipes healthier, you may have to make some ingredient substitutions.
QOTD: Do you have a favorite celebrity cookbook? If not, what’s your favorite dish to cook?
Do you like country music? Who’s your favorite singer/group?
This is a very filling soup that is actually a recipe of my mum’s that we have been making on and off in the restaurant for years. Use the very best quality fish and shellfish for the best flavour
Ingredients
1 tblsp rapeseed oil
1 tblsp butter, softened
2 large potatoes, cut into 1cm (1/2in) dice
1 small onion, cut into 1cm (1/2in) dice
1 carrot, cut into 1cm (1/2in) dice
1/2 small leek, cut into 1cm (1/2in) dice
1 tblsp plain flour
sea salt and freshly ground black pepper
150 ml (1/4 pint) dry white wine
300 ml (1/2 pint) fish stock (page 254)
100 g (4oz) skinless salmon fillet, cut into cubes
100 g (4oz) smoked coley fillet, cut into cubes
100 g (4oz) cooked mussel meat
100 g (4oz) cooked peeled prawns
150 ml (1/4 pint) cream
1 tsp chopped fresh flat-leaf parsley
1 tsp chopped fresh dill
1 tblsp parsley oil (page 250), to garnish
fresh micro salad, to garnish
makes about 1.2 litres (2 pints)
250 g (9oz) white fish trimmings and/or bones (such as lemon sole, brill or plaice bones)
3 leeks, trimmed and chopped
3 carrots, chopped
1 fennel bulb, chopped
large handful of fresh parsley, roughly chopped
175 ml (6fl oz) dry white wine
100 g (4oz) fresh flat-leaf parsley
100 ml (3 1/2fl oz) rapeseed oil
sea salt
Method
Heat the oil in a large pan over a medium heat and then add the butter. Once it stops sizzling, tip in the potatoes, onion, carrot and leek and cook for 5 minutes, until softened but not coloured. Add the flour and cook on a low heat for 2 minutes, stirring continuously. Season to taste.
Gradually pour the wine into the pan and allow it to bubble down, stirring continuously. Add the stock and bring to the boil. Reduce the heat and simmer for 5 minutes. Stir in the salmon and coley and simmer for 5 minutes, then add the mussel meat, prawns and cream and simmer for another 2–3 minutes, until warmed through. Stir in the herbs and season to taste.
To serve, ladle the soup into warmed bowls and garnish each one with the parsley oil and micro salad.
Method
Rinse the fish bones and trimmings of any blood, which would make the stock look cloudy and taste bitter. Place into a large heavy-bottomed stockpot with the leeks, carrots, fennel and parsley.
Pour in the white wine, then add 2.4 litres (4 pints) cold water to cover the fish and vegetables. Place on a high heat and bring to a simmer. After 5 minutes, remove the scum that forms on the surface with a spoon and discard. Reduce the heat and simmer, covered, for about 25 minutes, skimming as necessary.
At the end of the cooking time, remove the stock from the heat and strain, discarding the fish trimmings and the vegetables. Cool and store in a plastic covered jug in the fridge and use as required.
Method
Pick the leaves from the parsley and place in a mini blender, discarding the stalks. Add the rapeseed oil and a pinch of salt and blend for 5 minutes, until completely smooth.
Pass the parsley mixture through a fine sieve into a jug and then transfer to a squeezy bottle. Use as required.
Notes
Neven’s tips: This soup can be made up to 24 hours in advance and kept covered in the fridge. Just be careful when reheating not to allow it to come to the boil or the fish will lose its texture. Splash out on a rosé Champagne, rosé Cava or a ripe Chardonnay from Macon in Burgundy.
This recipe and many more are available in Neven Maguire’s The MacNean Restaurant Cookbook, published by Gill & MacMillan Books and available to buy here.
2 tbsp extra virgin olive oil, plus a little extra, if liked
500ml (18fl oz) boiling water
75g (3oz) rice flour
1 tbsp sumac, plus extra to garnish
150g (5oz) organic salmon fillets, pin-boned and skinned
75g (3oz) toasted pumpkin seeds
2 tbsp flax seeds finely grated rind of 1 lemon
2 large handfuls of watercress
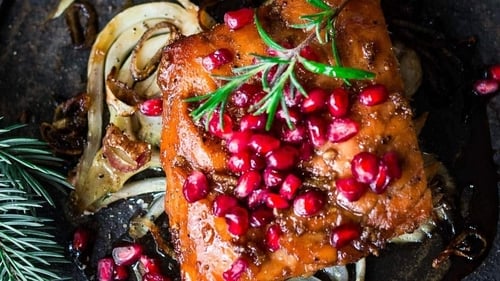
1 small pomegranate, halved and seeds removed (skin discarded)
lemon wedges, to garnish
HARISSA YOGHURT:
2 heaped tbsp thick Greek yoghurt
2 tsp harissa paste
sea salt and freshly ground black pepper
Method
Neven Says: “This is a super-healthy dish packed full of omega-3. Sumac is made from the dried berries of a flowering plant that are ground to produce an acidic, reddish- purple powder that is very popular in the Middle East.
Place the couscous in a heatproof bowl and season well, then stir in 1 teaspoon of the oil. Pour over the boiling water, cover tightly with cling film and set aside.
Heat the rest of the olive oil in a large non-stick frying pan over a medium to high heat. Put the rice flour in a shallow dish with the sumac and season generously with salt and pepper. Dust the salmon in the flour mixture, shaking off any excess. Add to the heated oil in the frying pan and cook for 2–3 minutes on each side, until crisp and golden.
Meanwhile, fluff up the couscous with a fork, then fold in the pumpkin seeds and flaxseeds with the lemon rind. At the last moment, roughly chop the watercress and toss it through the couscous with the pomegranate seeds.
Mix the yoghurt and harissa together in a small bowl and season to taste. Cover with cling film and chill until needed.
Arrange the crispy salmon on plates and add an extra light sprinkling of sumac. Add a small mound of the couscous, then drizzle over a little extra olive oil, if liked. Garnish with lemon wedges and add a spoonful of the harissa yoghurt to serve.
#Ad | Strawberry season is in full swing and this Irish Strawberry Baked Cheesecake from our @simplybetterds brand ambassador @Neven Maguire is the perfect way to use our delicious Simply Better Irish strawberries from @clarkesfreshfruit. Find the recipe below and shop the ingredients online or in your local @dunnesstores
Ingredients | Serves 6-8
FOR THE BASE 1 Pack Simply Better Normandy Butter Vanilla Sablé Biscuits 60g Simply Better Abernethy Sea Salted Butter, melted FOR THE CHEESECAKE FILLING 3 Tubs Simply Better Irish Original Cream Cheese 180g Simply Better Greek Yogurt (10% Fat) 200g Caster Sugar 3 Simply Better Irish Free Range Corn Fed Large Eggs 1 Tsp. Vanilla Extract
FOR THE TOPPING 1 Bag of Simply Better Frozen Irish Strawberries 1 Pack Simply Better Irish King Strawberries, sliced 3 Tbsp. Water 3 Tbsp. Sugar 1 Tbsp. Cornflour
Method 1. Preheat the oven to 180°C Fan. 2. Combine the frozen strawberries, water, sugar and cornflour in a saucepan and bring to the boil, reduce the heat then simmer for 5-10 minutes until the strawberries are soft, then hand blend and simmer again for a further 10 minutes until reduced and thickened. Allow to cool before you stir in the fresh strawberries. 3. Blitz the biscuits until you achieve fine breadcrumbs and mix through the melted butter. 4. Line a spring form tin with baking parchment so that it is coming up the sides. Tip the biscuit into the base and spread out with the back of a spoon. Bake in the preheated oven for 8 minutes. Remove and allow to cool. 5. Reduce the temperature of the oven to 160°C Fan. 6. Mix all of the cheesecake filling ingredients until well combined. Pour over the cooled base and bake for 45-50 minutes, it should have a slight wobble in the centre. Turn off the oven and allow it to sit for another 10-15 minutes before removing. Allow to cool then leave to chill in the fridge overnight. 7. Top with the strawberries before serving.1w
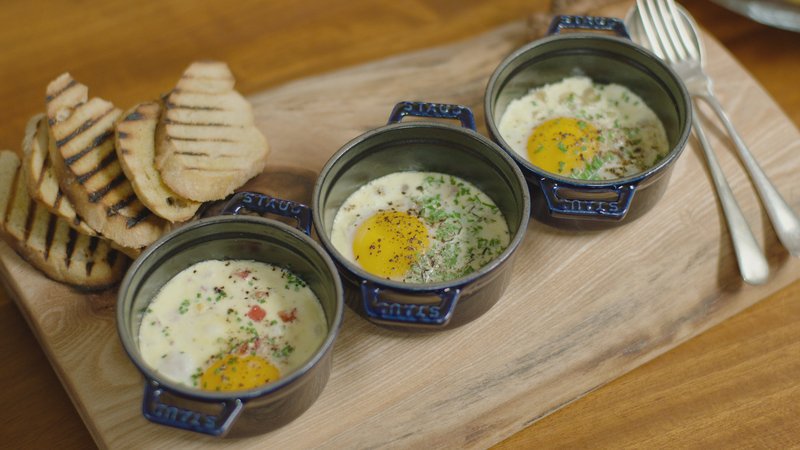
Experiment with other flavour additions – a little chopped cooked ham or Parma ham, diced cooked mushrooms, a few herbs or some sliced artichoke heart can all go into the base before you crack in the egg. For a really extravagant addition, add a drop or two of white truffle oil over the cream.
Ingredients
Butter, for greasing
2 ripe vine tomatoes, peeled, seeded and finely chopped
4 large eggs
4 tblsp cream
25g (1oz) mature cheddar cheese, finely grated
1 tsp snipped fresh chives
Sea salt and freshly ground black pepper
Griddled sourdough bread sliced into chunky fingers, to serve
Method
Preheat the oven to 190°C (375°F/gas mark 5).
Butter 4 blini pans or ramekins and scatter the tomatoes in the bottom.
Crack an egg into each blini pan and season with salt, then add 1 tablespoon of cream to each one and scatter the cheddar on top.
Arrange the blini pans in a shallow roasting tin and pour in enough boiling water to come about halfway up the side of each pan.
Place in the oven and bake for 15 minutes, until the eggs are set and the cheese is bubbling.
Set each blini pan on a plate and scatter over the chives, then add the chunky bread fingers to serve.
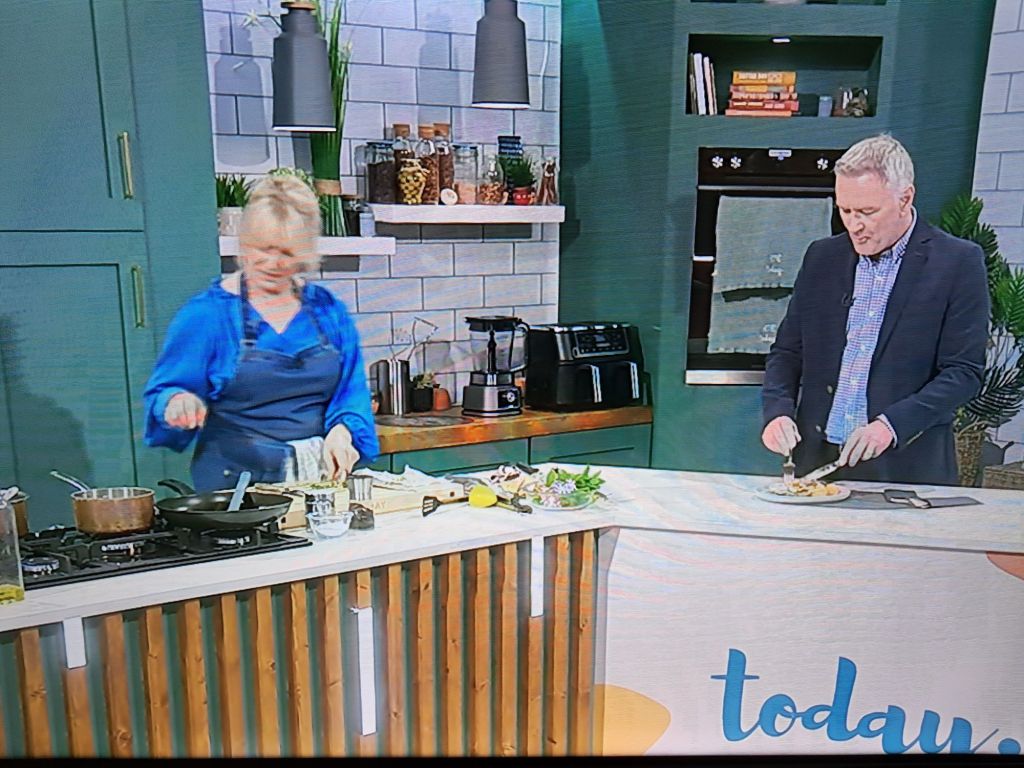
Sharon Hearne Smith’s Sesame Seed Porridge Bread from Today with Maura and Dáithí.
Ingredients
This is an unusual bread recipe, based on porridge oats and yoghurt instead of flour and water. It is quick, easy and virtually foolproof to make.
Use any selection of seeds you prefer instead of sesame seeds, or omit them altogether for a plain bread. Alternatively, add other flavours like nuts and dried fruits or sundried tomatoes and basil or a swirl of pesto would be delicious too. This bread stays quite moist and fresh for a few days stored in an airtight container.
Makes: 1 loaf (about 12 slices)
Sunflower oil for greasing
500g tub natural yoghurt
100ml milk
2 tbsp olive oil
2 tbsp sesame seeds + extra for sprinkling
2 tsp bicarbonate of soda
2 x 500ml yoghurt tubs of porridge oats (or 400g)
butter for serving, optional
Method
Preheat the oven to 200C (fan 180C), 400F, Gas Mark 6. Grease a 1Lb loaf tin (approximately 3 x 5 x 7 inch) with parchment paper and grease again.
Scoop the yoghurt into a large bowl. Add the milk, oil, sesame seeds and bicarbonate of soda and mix until well blended.
Fill a clean and dry yoghurt tub with oats and tip them in. Repeat with a second tub of oats. Alternatively, weigh out 400g of oats on a scales.
Mix everything together until well blended.
Spoon into the prepared tin, spreading the top level. Scatter a small handful of sesame seeds on top.
Bake for 45 minutes or until golden brown and a skewer comes out clean when pierced in the middle.
Remove from the tin and return the loaf to oven, directly on the shelf, for another 5 minutes to dry out the crust.
Remove and leave to cool on a wire rack. Cut into slices and serve spread with a little butter if liked.
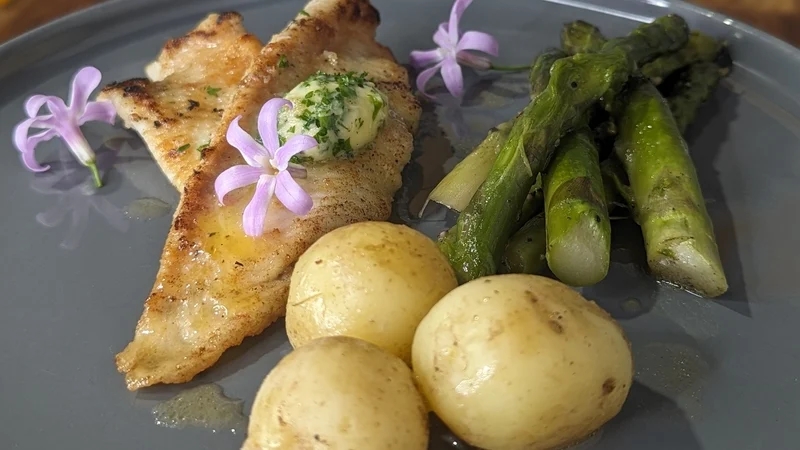
Rachel Allen’s pan-fried fish with herb butter, asparagus, new potatoes.
Ingredients
Serves: 4-6
For the herb butter:
50g soft butter
1 tablespoon chopped herbs such as dill, fennel, chives, parsley
A squeeze of lemon juice
Salt and pepper
For the pan-fried fish:
4 fillets of flat fish, such as John Dory, plaice, sole, brill or turbot, or part of a round fish fillet, like salmon, cod, grey mullet, etc. (allow 175g for a main course and 75g for a starter)
Approximately 4 tablespoons flour
Extra virgin olive oil or soft butter
A pinch of sea salt flakes and freshly ground black pepper
Method
Dry the fish fillets on kitchen paper.
Season on both sides with sea salt flakes and freshly ground black pepper.
Heat a cast iron or non-stick frying pan on a high heat until smoking. Add a dash of olive oil and put in the fish fillets.
OR you can dust the fillets with seasoned flour then spread some soft butter over one side.
Place buttered side in the pan first. Turn when golden on one side, then cook again until golden on the other side.
Place a couple of slices of herb butter over each fillet and serve immediately with asparagus and boiled new potatoes.
This scone recipe can also be made into one large loaf cooked on a baking sheet. Cut a deep cross in the center and bake in the preheated oven for 20 minutes, then reduce the heat to 400ºF (200ºC), Gas mark 6 and continue to cook for another 20 minutes until the base sounds hollow when tapped.
Ingredients:
2 2/3 cups (1lb) plain flour, extra for dusting
1 tsp salt
1 tsp bicarbonate of soda
1 tsp caster sugar
2 tbsp (1oz) Kerrygold Salted Butter, chilled and diced
1 cup (8fl oz) buttermilk
1 large egg, beaten
Kerrygold butter curls and strawberry jam, to serve
Directions:
Preheat the oven to 425°F (220°C), Gas mark 7. Sift the flour into a bowl with the salt and bicarbonate of soda. Stir in the sugar and then, using your fingertips, rub in the butter until the mixture resembles fine breadcrumbs.
Make a well in the center and pour in the buttermilk and beaten egg. Using a tablespoon, gently and quickly stir the liquid into the flour. It should be soft but not sticky. Lightly flour the work surface. Turn the dough out onto it and pat into a circle about 1in (2.5cm) thick. Cut into triangles with a sharp knife or stamp out 2in (5cm) rounds with a cutter.
Arrange the scones on a non-stick baking sheet and bake for 15 minutes until well risen and golden brown. Leave to cool for at least 10 minutes on a wire rack, then serve with the butter curls and jam.
Cheddar variety
Mix ¼ cup (1oz) (25g) of Kerrygold grated Aged Cheddar in with the buttermilk. Brush the finished scones with melted Kerrygold butter and sprinkle with another ¾ cup (3oz) (75g) grated Kerrygold Aged Cheddar before baking. Mix 1 teaspoon wholegrain mustard into 2 tbsp (1oz) (25g) of butter and use to spread on the split baked scones before topping with sliced cooked ham or tomatoes to serve.
Fruit variety
Add ½ cup (2oz) (50g) of sultanas or raisins or dried pitted cherries when stirring the sugar into the dry ingredients, then finish as described above.
Butternut squash risotto is a delightful and nutritious dish that combines the creamy texture of traditional risotto with the wholesome goodness of brown sushi rice and a medley of vibrant vegetables. Perfect for a cozy dinner or a special occasion, enjoy a hearty and healthy meal that will leave you feeling satisfied and nourished.
Servings: 6 Serving Size: ¾ cup
Nutritional Information Per Serving
171 calories
5 g total fat
3 g saturated fat
0 g transfat
0 g monounsaturated fat
13 mg cholesterol
362 mg sodium
24 g total carbohydrate
3 g dietary fiber
4 g total sugars
8 g protein
Ingredients
½ cup uncooked brown sushi rice
1 teaspoon olive oil
1 cup diced onion
4 cups low-sodium chicken stock
1 cup white wine
2 cups roasted butternut squash, chopped
1 cup chopped zucchini
½ cup frozen peas
5 chopped crimini mushrooms
1 tablespoon chopped sage
1 teaspoon chopped thyme
½ cup shredded Asiago cheese
1 tablespoon heavy cream
½ teaspoon kosher salt
½ teaspoon ground black pepper
Directions
Follow package directions to partially cook the rice for about 40 minutes. Drain excess water and set aside.
Preheat a medium sauté pan to medium-high heat and add olive oil.
Add the onions and sauté until soft.
Add the rice to the pan and sauté with the onions for about 2 minutes, stirring continuously.
Reserve 1/2 cup of stock. Then pour 1/2 cup of stock into sauté pan and let it absorb into the rice.
Stir in 1/2 cup of wine and let it absorb into the rice.
Continue adding stock and wine in 1/2-cup increments, cooking each time until the liquid is absorbed before adding more, about 30 to 45 minutes total.
Add the squash, zucchini, peas, mushrooms, sage and thyme to the pan, and cook until the vegetables are soft, about 3 to 5 minutes.
Add the last 1/2 cup of the stock. Once the stock is absorbed into the rice, add the cheese, cream, salt and pepper; stir well.
Dietitian’s tip:
Traditional risotto is made with uncooked white rice. Brown rice adds fiber and nutrients, but it takes a long time to make risotto this way. That’s why this recipe calls for partially cooking the rice.
My brother, Kenneth, loves Asian food and he is in no doubt that he is far better than me at cooking it! I don’t disagree. He is proud of this chicken satay dish and often makes it for the family. This dipping sauce also works well with pork, prawns, beef strips or turkey. And remember, kids just love anything on sticks!
SERVES 4
4 tbsp dark soy sauce
2 tsp clear honey
2 tsp medium curry powder
450g (1lb) skinless chicken breast fillets, cut into long strips
FOR THE PICKLED CUCUMBER SALAD:
4 tbsp rice wine vinegar
2 tbsp caster sugar
pinch of salt
½ small cucumber, peeled, halved, deseeded and thinly sliced
FOR THE DIPPING SAUCE:
2 tbsp crunchy peanut butter
2 tsp dark soy sauce
1 tsp light brown sugar
juice of ½ lime
1 x 160ml (5½fl oz) tin of coconut milk (Thai Gold, if possible)
½ red chilli, deseeded and finely diced
2 tbsp chopped fresh coriander
sea salt and freshly ground black pepper
1 To make the dipping sauce, place the peanut butter in a small pan and stir in the soy sauce, light brown sugar and lime juice. Gradually whisk in the coconut milk and heat gently until you have achieved a smooth sauce. Stir in the chilli and coriander, then leave to cool, stirring occasionally to prevent a skin from forming.
2 Soak 8 x 15cm (6in) bamboo skewers in a shallow dish of cold water for at least 30 minutes. Preheat a griddle pan until it’s smoking hot or light a barbecue.
3 Whisk together the soy sauce, honey and curry powder. Season with pepper and stir in the chicken pieces. Leave to marinate for 2 minutes, then thread the chicken pieces onto the soaked bamboo skewers and arrange on the barbecue. Cook the chicken skewers over medium-hot coals for 4–6 minutes, turning once or twice, until completely tender and cooked through. If using a griddle pan, reduce the heat to medium as soon as you’ve put the skewers on.
4 Meanwhile, to prepare the pickled cucumber salad, place the vinegar in a bowl and stir in the sugar and a good pinch of salt until both have dissolved. Tip in the cucumber, stirring to combine, and set aside to allow the flavours to develop. 5 To serve, arrange 2 chicken satay skewers on each warmed plate. Divide the dipping sauce among individual bowls and place to the side of the skewers. Add the pickled cucumber salad, leaving behind any excess liquid, to serve.
Butter Chicken
Swap your usual takeaway curry for this homemade chicken makhana, which combines marinated chicken with a rich, buttery sauce. This is an authentic Indian curry with its origins in Delhi, where it was first made to use up pieces of leftover tandoori chicken.
Serves 4–6
500g skinless and boneless chicken breasts or thighs
juice and finely grated rind of 1 lemon
3 tbsp mild curry seasoning
4 tbsp natural yogurt
3 tbsp sunflower oil
30g butter
2 red onions, thinly sliced
2 garlic cloves, sliced
1 red chilli, seeded
3cm piece fresh root ginger, peeled and sliced
20g fresh coriander
400ml passata (Italian sieved tomatoes)
120ml cream
sea salt and freshly ground black pepper
Trim the chicken and cut into bite-sized pieces. Put in a bowl and stir in half the lemon juice with a good pinch of salt. Add 2 tablespoons of the curry seasoning, the yogurt and 1 tablespoon of the oil. Mix to combine, then season generously with pepper. Cover and leave to marinate for at least 1 hour or up to 3 days in the fridge.
Heat the rest of the oil and a knob of the butter in a wok or skillet over a high heat, and quickly sear the marinated chicken in batches until golden brown, transferring with a slotted spoon to a clean bowl as you go. Add the onions to the pan and sauté for 4–5 minutes until they start to caramelise.
Tip in the garlic, chilli and ginger, then add another knob of the butter and sauté for 1–2 minutes. Chop the stalks from the coriander and add them to the pan with the rest of the curry seasoning and another knob of the butter. Toast for a few minutes until very fragrant. Pour the passata into the pan and bring to a simmer, then add the cream and the rest of the lemon juice.
Transfer to a blender and blend until you have a very smooth sauce. Return to the pan and add the chicken with any juices and reheat gently for about 5 minutes until the chicken is cooked through and tender. Season to taste, then fold in the lemon rind with the rest of the butter and the coriander leaves, reserving a few sprigs to garnish. Transfer to bowls and garnish with the coriander sprigs.
SERVE WITH … This mild and creamy curry is sure to please all tastes. Make some Homemade Flatbreads, perhaps brushing them with a little melted butter and sprinkling with black onion seeds. A bowl of Pilau Rice completes the meal, alongside some spiced mango chutney, mint raita and lime pickle.